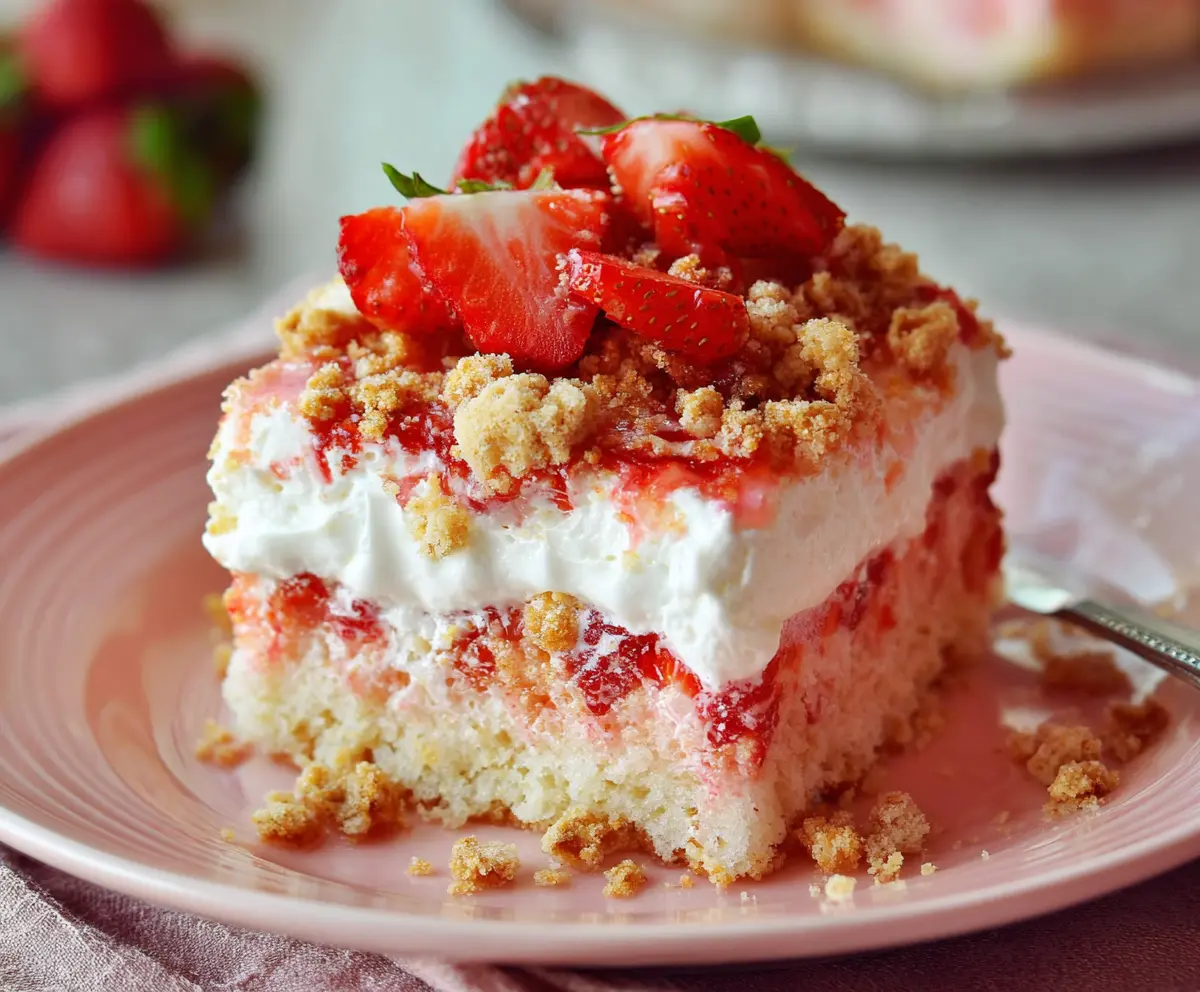
This Strawberry Crunch Poke Cake is a fun and colorful dessert that’s perfect for any gathering! It’s super soft, filled with strawberry goodness, and topped with a sweet, crunchy layer.
The best part? You get to poke holes in the cake and let all that strawberry flavor soak in. It’s such a treat to see everyone enjoy the crispy topping sprinkled on each slice! 🍰
Key Ingredients & Substitutions
Cake Mix: A white cake mix gives a light and fluffy base. You can use yellow cake mix for a richer flavor, or even a gluten-free cake mix if you’re accommodating dietary needs!
Strawberry Gelatin: This adds sweet strawberry flavor. If you prefer a less sweet option, try using sugar-free strawberry gelatin or even fresh pureed strawberries mixed with a bit of sugar for that vibrant flavor.
Frozen Strawberries: Thawed strawberries work great here, but fresh strawberries can also be used if they are in season! Just slice and layer them directly over the baked cake.
Cream Cheese: Cream cheese provides richness. If you want a lighter version, you can substitute reduced-fat cream cheese or even Greek yogurt.
Whipped Topping: Traditional whipped topping makes this dessert fluffy and creamy. If you’re looking for a homemade option, you can whip heavy cream with sugar and vanilla instead!
Crushed Vanilla Wafers: For a crunchy topping, you can easily swap these for crushed graham crackers or even crushed shortbread cookies.
How Do I Poke Holes in the Cake Without Making a Mess?
Poking holes is essential for letting the flavor seep into the cake. Use the handle of a wooden spoon for better control and even spacing. Poke gently, but don’t be shy! Aim for holes about 1 inch apart over the entire surface, creating little pockets for the gelatin to soak in.
- Start at one end and work your way across the cake for an even distribution.
- Be careful not to press too hard, as you want to maintain the cake’s structure.
- Once the holes are done, sprinkle the dry gelatin evenly for the best flavor absorption.
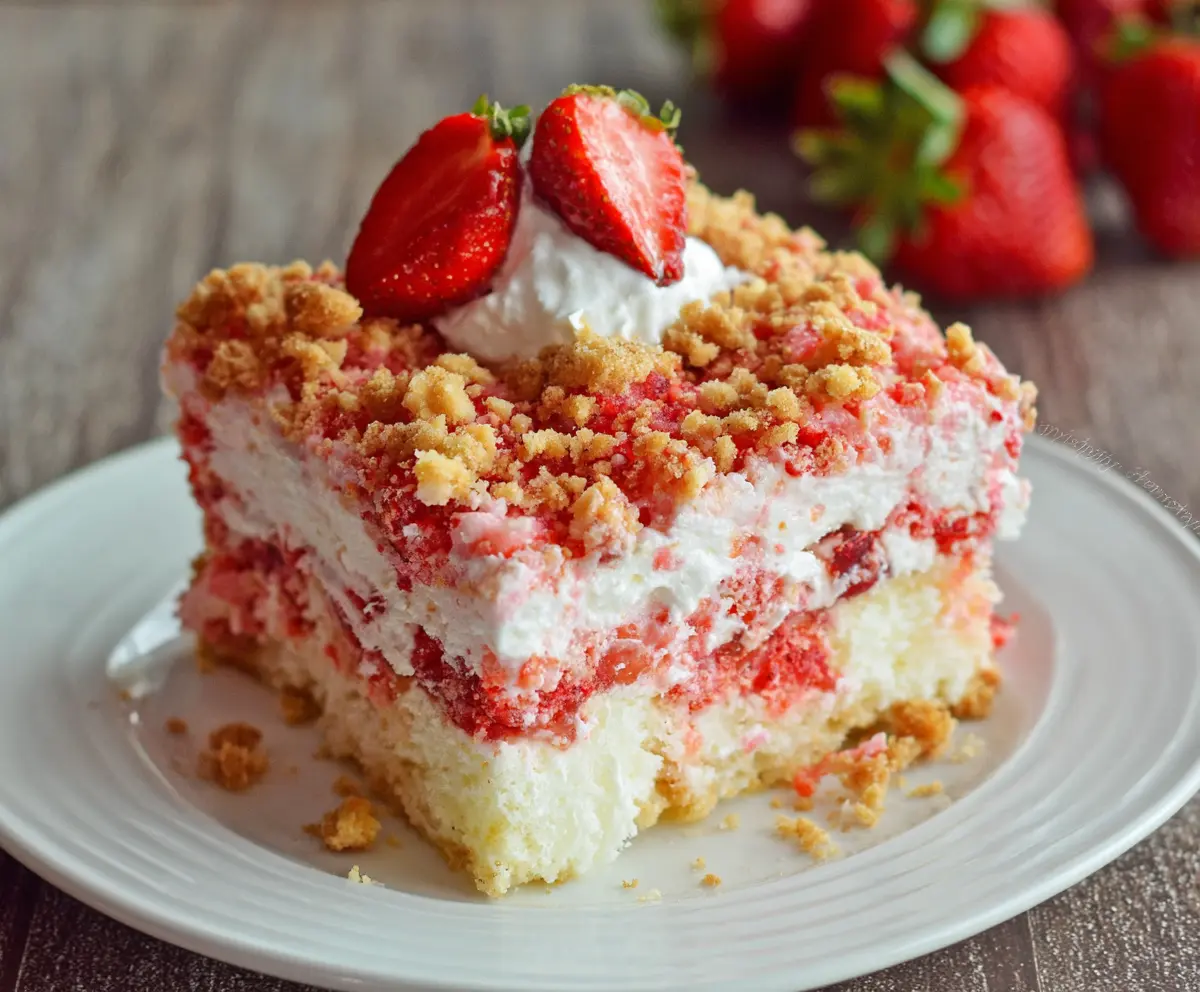
Delicious Strawberry Crunch Poke Cake Recipe
Ingredients You’ll Need:
For the Cake:
- 1 box white cake mix (plus ingredients listed on the box: eggs, oil, water)
For the Strawberry Layer:
- 1 (3 oz) package strawberry gelatin (Jell-O)
- 1 (10 oz) package frozen strawberries, thawed and drained
For the Creamy Topping:
- 1 (8 oz) package cream cheese, softened
- 1 cup powdered sugar
- 1 (8 oz) container whipped topping (Cool Whip), thawed
For the Crunchy Finish:
- 1 cup crushed vanilla wafer cookies or crunchy cookie crumble topping
- Fresh strawberries, sliced (for garnish)
How Much Time Will You Need?
Overall, this cake will take about 1 hour of prep and baking time, plus 2 hours chilling time in the refrigerator. So, plan for around 3 hours total before you can serve this delightful dessert. The wait is definitely worth it!
Step-by-Step Instructions:
1. Bake the Cake:
Start by preheating your oven to 350°F (175°C). Follow the instructions on the box for the white cake mix. Mix together your ingredients—usually eggs, oil, and water—and pour the batter into a greased 9×13 inch baking pan. Bake according to package instructions, typically for about 30-35 minutes. Check if it’s done by inserting a toothpick into the center; it should come out clean. Once it’s baked, let it cool completely on a wire rack.
2. Prepare the Strawberry Layer:
Once your cake is cool, it’s time to poke holes! Use the handle of a wooden spoon to poke holes all over the top of the cake. Don’t be shy—poke them about 1 inch apart to let the strawberry gelatin soak in. Next, sprinkle the dry strawberry gelatin evenly over the cake, ensuring some gets into the holes. Then, lay the thawed and drained strawberries evenly over the gelatin layer so that you have a tasty fruit layer.
3. Make the Creamy Topping:
In a separate medium bowl, combine the softened cream cheese and powdered sugar. Beat these two together until you have a smooth and creamy mixture. Gently fold in the thawed whipped topping until everything is nicely blended and fluffy. This will be your creamy topping, which you’ll spread over the strawberries.
4. Add Crunch and Chill:
Spread the cream cheese topping evenly on top of the strawberries. Finally, sprinkle the crushed vanilla wafers or cookie crumble on top for that delightful crunchy layer. For the finishing touch, arrange fresh sliced strawberries as a garnish if you like!
5. Chill to Perfection:
Cover the cake and refrigerate it for at least 2 hours. This chilling time allows the flavors to combine beautifully and helps everything set properly. Once it’s ready, slice, serve, and enjoy this deliciously refreshing strawberry crunch poke cake!
Dig in and enjoy a slice of this summer delight—perfect for any occasion! 🍰
Can I Use Fresh Strawberries Instead of Frozen?
Absolutely! Fresh strawberries can be used in place of frozen. Just wash, slice, and layer them directly over the gelatin after you’ve baked and cooled the cake. Fresh strawberries can enhance the flavor, especially when they’re in season!
How Should I Store Leftover Cake?
Store any leftovers in an airtight container in the refrigerator for up to 3-4 days. If you have a lot of leftover toppings, it’s best to store the cake and toppings separately to keep the crunch intact!
Can I Make This Cake Ahead of Time?
Yes, this cake actually gets better as it sits! You can make it a day in advance, allowing the flavors to meld beautifully. Just be sure to keep it well-covered in the fridge until you’re ready to serve.
What Can I Substitute for the Cream Cheese?
If you’re looking for a lighter option, you can substitute reduced-fat cream cheese or use Greek yogurt for a healthier twist. This will still provide a creamy texture without the extra calories!